
Nail Polish Mistakes You’re Making – How to Fix and Last
Nail polish mistakes can feel unavoidable, but understanding the patterns behind them helps you break bad habits. In this guide, we explore the nuances of why polish chips, smudges, and peels happen and how to fix them without starting from scratch. This is all about mastering the craft of immaculate, long-lasting nails through practical, easy-to-implement steps. And yes, by the end you’ll know exactly how to avoid common nail polish mistakes so every manicure looks studio-perfect.
✅ Don’t Miss Out — Available While Supplies Last ⏳

$3.97

$6.79

nail polish mistakes
Why Your Nail Polish Never Looks Right (Even After Trying So Hard)

Before we dive into fixes, it’s essential to map out the big-picture reasons your manicure can fail. This section dissects the core missteps that undermine even the best efforts, from surface prep to product behavior. Understanding these fundamentals helps you connect the dots between cause and effect in real-world nail care. When you start noticing repetitive issues—like uneven textures or rapid chipping—take a step back and audit your process against the insights here. The goal is to build a reliable routine that consistently yields smooth, glossy results. Let’s unpack the six most common culprits and why they derail your nail game.
1. Applying Thick Coats of Polish

Thick coats feel like they dry faster, but they actually trap moisture and air underneath. The result is a polish layer that looks opaque on the surface while remaining gooey and unsettled beneath. The real drama happens when the underlying layer remains soft; dents, bubbles, and peelings become inevitable as soon as you touch or flex your nails.
- Thin coats, not thick, are the unsung heroes of long-lasting color.
- Patience matters: allow proper dry time between each layer.
- Build depth gradually with 2-3 thin layers rather than one chunky stroke.
From a practical standpoint, thick coats also widen the risk of smudging when you later perform ordinary tasks. If your daily routine includes typing, washing dishes, or quick hand-washing between steps, the urge to slather on richer color will backfire. The best approach is a deliberate, methodical layering process: base layer, color, then topcoat, with at least a minute’s pause between coats. You’ll notice a dramatic improvement in wear and shine when you adopt this rhythm.
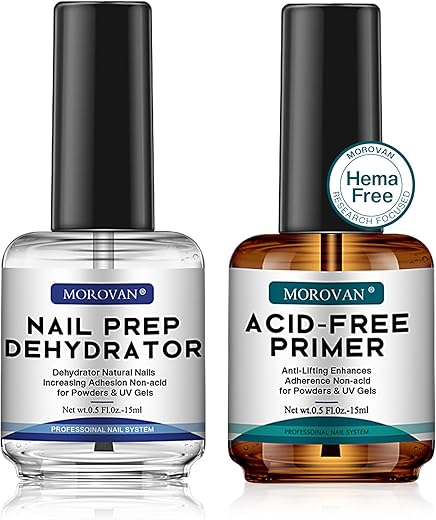
2. Skipping the Base Coat

Base coats aren’t just a courtesy; they’re the foundation that makes color adhere, protects your natural nail from staining, and even evens out the nail’s micro-surface for smoother color application. Skipping this step is a classic “shortcut” that costs you durability.
- A good base coat improves adhesion, reduces staining, and promotes a uniform color payoff.
- If you’re dealing with yellowing nails or ridges, the base coat is your first line of defense.
- For those who dislike thick layers, a thin base coat can be combined with color layers to optimize dryness time.
However, not all base coats are created equal. Some formulas include bonding agents that work better with certain polishes than others. It’s worth testing a few to find a compatible pair. If you’re sensitive to nails, look for base coats labeled as non-yellowing, strengthening, or hydrating. The payoff is a longer-lasting manicure with fewer visible imperfections.
3. Rushing Between Coats

Time pressure is a notorious enemy of long-wearing polish. When you transition too quickly from one layer to the next, the underlying coat remains soft and prone to denting, wrinkling, or peeling. The principle here is simple: patience creates resilience.
- A minimal wait of 60-90 seconds between layers is often enough for most polishes to set without fully hardening.
- If you’re in a rush, you can test dry-to-touch times and adjust your routine accordingly.
- Consider using a fan, cool air, or a quick-dry formula that suits your environment.
Rushing also reduces your ability to observe every coat’s finish. Imperfections can compound with each additional layer, so give your nails the courtesy of drying time. The result is a visibly smoother finish and a manicure that lasts longer.
4. Skipping the Top Coat

The top coat acts as a protective sealant and provides the glossy finish that instantly elevates a manicure. Without it, color fades faster, chips appear sooner, and moisture exposure becomes a bigger culprit for wear.
- A quality top coat extends wear and protects against daily wear and tear.
- It reduces the appearance of micro-scratches that can accumulate into visible flaws.
- Some top coats offer fast-drying properties without sacrificing durability.
If you’re chasing a quick-dry effect, choose a top coat that balances dry time with longevity. You’ll also appreciate a top coat with UV protection to prevent color fading, especially for brighter shades.
5. Painting on Oily or Wet Nails

Residual oils, lotions, soap, or water can create a barrier between the nail and the polish, leading to poor adhesion, peels, and early chipping. The surface needs to be completely free of contaminants for maximum grip.
- Wipe nails with a dedicated nail cleanser or isopropyl alcohol before painting.
- Ensure hands are completely dry after washing or contact with water.
- If your routine includes lots of handwashing, you may want to use a quick-dry formula to minimize moisture exposure.
This step is often ignored because nails feel dry after washing, but residual oils can linger in tiny amounts. That information matters: even a small film can undermine your efforts. A quick cleanse session can make a big difference in how well the color adheres and how long it lasts.
6. Shaking the Bottle Instead of Rolling It

Shaking can introduce tiny air bubbles into the polish, resulting in an uneven finish and possible micro-bubbles that show up later. The correction is simple yet often overlooked: roll gently.
- Hold the bottle between your palms and roll it back and forth for 30-60 seconds.
- If the formula seems too thick, wipe the neck, then reopen the bottle and test a thin layer.
- Avoid vigorous shaking, which can emulsify the polish and degrade the formula over time.
This technique preserves the polish’s consistency and helps ensure a smooth, even application. It may feel minor, but it has a direct impact on the final finish and wear.
The core takeaway: Nail polish mistakes often come down to a few bad habits that compound over time. By addressing these six factors, you’ll notice a meaningful improvement in both appearance and longevity.
Why These Mistakes Keep Happening Again and Again

Humans are creatures of habit, and nail care is no exception. Repetitive patterns in how we prepare, apply, and finish our nails can silently undermine the best-intentioned routines. This section unpacks why these mistakes recur, from skin-to-nail interactions to environmental influences, and it offers practical strategies to break the cycle.
- Habitual shortcuts. Skipping steps because they seem time-consuming is a classic trap. It’s easy to convince yourself that skipping base or top coats saves time, only to pay for it later with chips and dull finishes.
- Oils and residues hiding in plain sight. Even when nails feel dry, tiny layers of lotion, oils, or water may linger and undermine adhesion. A quick cleanse becomes an essential ritual rather than a chore.
- Environmental influences. The room’s humidity, temperature, and airflow can dramatically alter drying times. A fan might dry a layer too quickly, while a stuffy room might slow things down and trap moisture.
- Shifting routines with mood. When you’re excited about a new shade or in a rush, you’re more likely to skim steps. Consistency is the key to durable results, and consistency is built over time.
The practical takeaway here is to design a nails routine you can repeat exactly, every time. That means a well-timed sequence, a dedicated drying window, and a conscious effort to minimize variables that threaten your finish. Once you align your behavior with the science of polish adhesion and drying, the pattern of failures becomes far less frequent.
- Create a ritual. A predictable routine reduces variance and boosts outcomes.
- Prepare for the process. Cleanse, dry, and prime with intention.
- Revisit the product lineup. Update or test formulas to find the most compatible base, color, and top coat.
These steps aren’t about perfection; they’re about reliability. When you understand the why behind the mistakes, you’re better equipped to fix them and keep your nails looking fabulous.
✅ Don’t Miss Out — Available While Supplies Last ⏳
$3.97
$6.79
How to Fix Nail Polish Mistakes Without Starting Over

When a manicure goes awry, you don’t always need to wipe everything off and start again. There are targeted fixes for common errors that can salvage a look in minutes. This section arms you with practical, actionable techniques to address flaws without sacrificing your time or the result.
Quick note: The goal is to preserve the overall color and finish while restoring a smooth, even surface. Each fix is designed to minimize disruption to the manicure while maximizing its longevity.
1. Fixing Smudges or Dents
Smudges and dents are often the most visible flaws, and they can derail a look before you leave the house. The strategy here is to allow a moment for the polish to settle, then correct with precision.
- Let the polish settle for about a minute to firm up the surface.
- Use a tiny amount of nail polish remover on your fingertip and gently tap the dented spot.
- Lightly re-apply a new, thin coat over the corrected area to blend with the surrounding finish.
The key is minimal intervention. You don’t want to remove too much polish or disturb the adjacent layers. A careful touch-up can restore a glossy, uniform surface, giving your manicure a renewed life without starting over.
2. Fixing Air Bubbles
Air bubbles spoil a smooth finish and may create texture that catches on fabrics or during activities. The fix is to re-smooth with a fresh, very thin layer.
- Gently apply a tiny amount of polish over the bubbled area.
- Roll the bottle before opening to avoid adding more air.
- If necessary, seal with a top coat after the new layer dries.
The fix should be deliberate and quick. You don’t want to flood the area with color, which can create more bubbles or a lumpy finish. A light touch is your friend here.
3. Fixing Uneven or Patchy Spots
Uneven spots usually come from inconsistent pressure or uneven pigment distribution. The remedy is a careful, very thin patch layer.
- Cleanse/brush the surrounding area to remove any dust.
- Apply a micro-thin layer over the patch, feathering outward from the center.
- Add a final top-coat layer to unify the surface.
This approach blends the patch into the rest of the nail, preserving the overall look without requiring a full re-do.
4. Fixing Polish That Touched the Skin
Polish touching the skin can cause smudges, uneven drying, and messy edges. The fix is to correct early or to reshape the edge right away.
- Use a small brush dipped in nail polish remover to clean the skin edge.
- Allow the corrected edge to dry.
- Apply a thin coat over the entire nail to restore the seamless finish if needed.
This method helps avoid the appearance of jagged edges and keeps your manicure neat, which is essential for lasting wear.
5. Fixing a Whole Nail Without Starting Again
If a nail is way off—perhaps the color is dingy or the surface is severely bumpy—you can salvage via a light re-sculpted layer.
- Clean and prep the nail as usual.
- Apply a very thin layer over the entire nail, focusing on re-establishing a smooth base.
- Finish with a top coat to lock in the new surface.
The goal is minimal removal and maximum restoration. Sometimes a single micro-layer can rescue the entire manicure’s look and longevity.
Simple Changes That Will Make Your Polish Last Longer

When it comes to longevity, the difference often comes down to a few small adjustments rather than a complete reformulation. This section highlights practical strategies to extend wear, prevent chipping, and keep your nails looking polished longer.
- Lean into thinning techniques. If your polish dries too slowly or appears clumpy, a few drops of thinner can restore its flow and evenness.
- Maintain clean, dry surfaces. Regularly wipe nails with alcohol before applying color to ensure each layer adheres well.
- Respect the drying windows. Even a short pause between layers can dramatically increase durability.
- Use high-quality top coats. A strong top coat acts as a shield against daily wear and environmental stress.
- Consider nail prep enhancements. Gentle buffing and cuticle care can improve adhesion and finish.
These changes are practical, repeatable, and effective. They don’t require specialized tools or significant time digs but do demand consistency. The return on investment is a manicure that looks freshly done for days longer than usual.
- Build a checklist: prep, base, color, top coat, and maintenance.
- Choose your formulas with adhesion and wear in mind.
- Set realistic expectations for drying times in your environment.
With a little discipline, your nails can retain that salon-grade glow longer, making every color payoff feel intentional and well-managed.
Nail Polish Myths You Should Stop Believing
Myths can color our decisions as much as facts do. Debunking common nail polish myths helps you approach your routine with clarity and confidence. This section examines some of the persistent beliefs that can sabotage your technique and time.
1. Blowing on Your Nails Helps Them Dry Faster
The instinct to blow on nails is widespread, but warm breath can introduce moisture and bacteria. It may even mislead you into thinking the nails are dry faster, which can lead to premature activity and chips.
- Let the polish dry naturally in a controlled environment.
- If you need to speed things up, use a fan with gentle airflow or a dedicated quick-dry top coat.
- Avoid external heat sources that can cause cracking or warping.
This myth undermines your nails’ ability to form a stable, hard finish. A better approach is controlled drying with proper technique and product choices.
2. Old Nail Polish Works Fine If You Shake It Well
Shake or roll? The nuance matters. Shaking can trap air and separate pigments, altering color and texture. Rolling is safer, but still must be gentle.
- Store polish upright to minimize separation.
- Roll gently to recombine pigments and solvents.
- If the formula is very old, consider replacement for reliability.
This myth can lead to inconsistent results. Treat old bottles like fragile systems that benefit from careful handling.
3. You Don’t Need a Base Coat
The base coat is not a luxury; it’s a functional ally for adhesion and protection. Skipping it can lead to staining, uneven color, and shorter wear.
- Choose a base coat suited to your nail health and polish type.
- For stained nails, a whitening or protective base coat can be beneficial.
- Pair base coats with your chosen top coat for optimal longevity.
If you’re unsure about the value, test a small patch on a nail to see the difference.
4. Any Top Coat Will Work the Same
Top coats vary in gloss, durability, and drying times. A poor matchup can lead to faster chipping or a dull finish.
- Match top coat properties to your color and desired finish.
- Layer quality top coats for enhanced protection, especially when using potent shades.
- Replace old top coats when they thicken or separate.
The top coat is the final shield for your color. Treat it with care and select one that complements your goals.
5. Quick-Dry Sprays or Drops Ruin Your Nails
Quick-dry formulas can be convenient, but not all are equal. Some can make the surface appear dry but leave a soft underlayer vulnerable to damage, resulting in chips or cracks sooner than you’d like.
- Read labels to understand drying mechanics and protective properties.
- Use a quick-dry product as a finishing step in moderation.
- If you notice dullness or brittleness, reconsider the product’s placement in your routine.
The right approach is balanced: fast-drying when appropriate, but with durable protection that aligns with your wear expectations.’


Conclusion

Nail polish mistakes aren’t flaws in you—they’re signals about how your routine interacts with your nails, your products, and your environment. By embracing a methodical approach—prioritizing a clean, oil-free canvas; using thin, properly layered coats; leveraging base and top coats; and choosing the right formulas—you can transform a habitual problem into a reliable, high-performing ritual. The small, consistent adjustments make a big difference in how long your manicure lasts and how smoothly it looks from day to day.
If you want to dive deeper into the science of polish behavior, explore more about how to avoid smudging nail polish and how to fix nail polish mistakes with minimal fuss. With the right habits, you can enjoy salon-like results at home, every single time.
- For ongoing improvement, track your routine and note which steps yield the best wear for your lifestyle.
- Consult brand-specific guides to optimize compatibility between base coats, colors, and top coats.
- Experiment with product combinations to find your best system for nail polish mistakes that ruin your manicure—because the goal is confidence and consistency, not perfection.
By applying these strategies, you’ll master the art of long-lasting nails and minimize nail polish mistakes, turning every manicure into a polished, reliable expression of your personal style.
$6.99

$5.99
$7.99