
15 Budget-Friendly DIY Garden Organizing Projects

Introduction: Embrace DIY Gardening This Spring
As the warmth of spring approaches, homeowners often find themselves inspired to breathe new life into their outdoor spaces. The annual transition serves as a reminder of the potential that lies within neglected gardens, making it an ideal time to undertake transformative projects. One of the most engaging and cost-effective ways to rejuvenate your garden is by embracing budget-friendly DIY garden organizing projects. These projects not only offer an opportunity for creativity but also allow individuals to personalize their gardening experience while maintaining a sustainable approach.


The emphasis on affordability ensures that anyone can participate in DIY gardening, regardless of their financial situation. With a range of materials often sourced from local suppliers or even repurposed items around the home, these initiatives encourage the use of creativity and resourcefulness in garden organization. By focusing on twelve budget-friendly DIY garden organizing projects, you can effectively enhance your outdoor space without incurring significant expenses.
Furthermore, personalization in gardening transcends mere aesthetics; it fosters a connection between the gardener and their environment. Each DIY project can be tailored to reflect personal preferences and styles, allowing for a harmonious outdoor space that resonates with the individual. This aspect of gardening not only cultivates beauty but also nurtures a sense of ownership and pride in one’s garden.
Additionally, participating in these hands-on activities can be a fulfilling experience, providing an escape from the fast-paced nature of modern life. As you engage in DIY projects, the process becomes just as rewarding as the final outcome. By approaching garden organization with a budget-friendly mindset, you consciously contribute to sustainability, ensuring that your gardening practices have a positive impact on the environment. Establishing a well-organized garden will enhance your outdoor experience, making it a welcoming space for both relaxation and enjoyment this spring.


Repurposed Planters: Unique Homes for Your Plants
Repurposed planters offer a unique way to foster creativity while contributing to sustainability in your garden. By reimagining everyday items, gardeners can create one-of-a-kind homes for their plants without incurring significant expenses. Common materials such as rusty tins, wooden pallets, and mason jars can easily be transformed into charming planting containers. This approach not only conserves resources but also adds a personal touch to your garden.
When considering rusty tins, it is essential to ensure that any sharp edges are smoothed out for safety. You can paint the tins in vibrant colors or leave them with a rustic patina for an eclectic look. To provide adequate drainage, drill small holes at the bottom of each tin, allowing excess water to escape. These repurposed planters are perfect for growing herbs, which thrive in smaller spaces and can be conveniently placed near your kitchen for easy access.
Wooden pallets can also be cleverly utilized to create vertical planters or garden frames. Simply stand the pallet upright and fill the spaces with soil to introduce a wide variety of plants, from colorful flowers to hardy vegetables. Engaging in this DIY garden organizing project promotes vertical gardening, thereby saving ground space while enhancing aesthetics.
Mason jars, on the other hand, make excellent small planters, particularly for growing succulents. Proper preparation involves ensuring jars are clean and dry, adding a layer of small stones for drainage, and filling them with a well-draining potting mix. Not only do these jars serve as attractive decor, but they also provide a controlled environment ideal for succulent growth.
In conclusion, repurposing everyday items into planters fosters both creativity and practicality in gardening. By participating in these budget-friendly DIY garden organizing projects, individuals can cultivate diverse plants while making a positive impact on their environment.


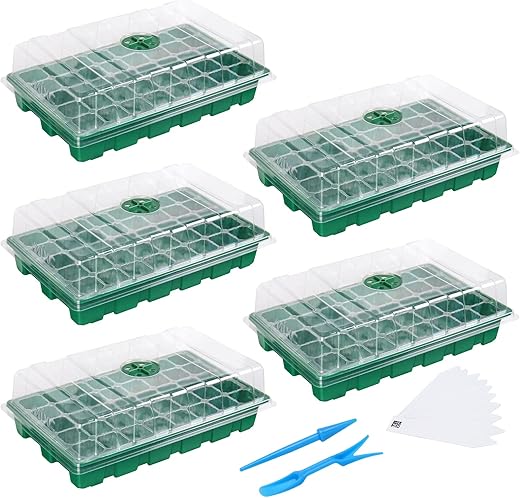
Seed Starting Trays: Cost-effective Seedling Preparation
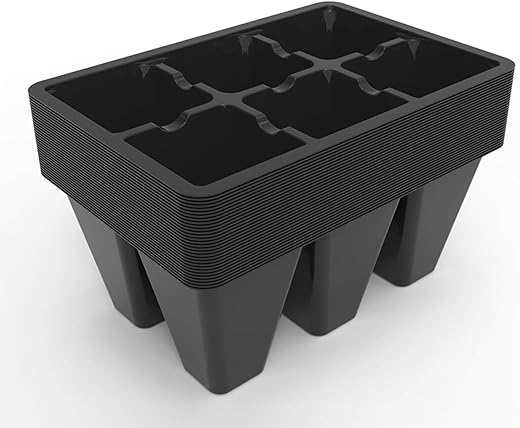
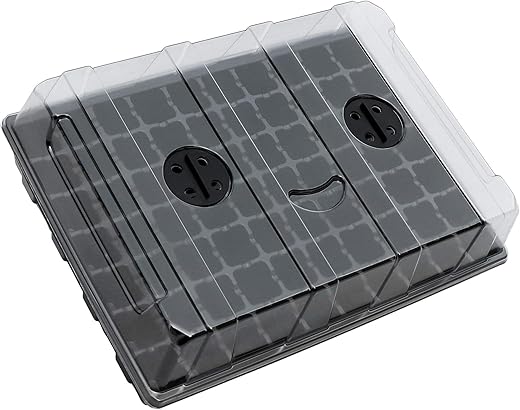
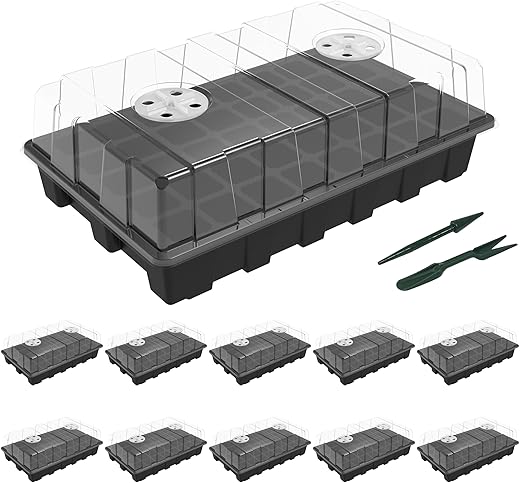
Seed starting trays play a crucial role in the success of any gardening endeavor, particularly in preparation for the spring planting season. These trays, designed to support seedlings at a vulnerable stage, provide a controlled environment that fosters strong plant growth. Nurturing seedlings in their early stages allows for optimal light exposure, moisture retention, and protection from harsh external conditions, ultimately leading to healthier and more robust plants. However, not all gardeners need to invest in expensive store-bought versions of seed starting trays, as there are several budget-friendly DIY alternatives available.
One effective option is to reuse common household items such as egg cartons and yogurt containers. Egg cartons are especially suitable as they offer individual compartments that can house a single seedling, promoting better root development. To prepare these trays, simply cut the carton into separate sections if desired. Like egg cartons, yogurt containers are also exceptional for seed starting. To enhance them for this purpose, it is important to add drainage holes at the bottom to prevent excess water accumulation. A sharp object or a drill can accomplish this easily.
Once prepared, fill these DIY trays with a quality seed starting mix. This specialized medium ensures adequate drainage and aeration, essential for proper seed germination. After filling the compartments, make sure to water them gently to moisten the soil without saturating it. Using these budget-friendly DIY garden organizing projects not only helps save money but also encourages sustainable practices by repurposing household items. These trays can serve as an ideal launching pad for seedlings, providing all the necessary elements they require for strong, healthy development, allowing garden enthusiasts to enjoy a fruitful harvest come spring.


DIY Seed Bombs: Attracting Pollinators Naturally
Incorporating budget-friendly DIY garden organizing projects can transform not only the aesthetic of your garden but also its ecological impact. One engaging project that aligns with this goal is the creation of DIY seed bombs. These delightful, compact balls made from clay, compost, and wildflower seeds serve a dual purpose: they are fun to make and play a crucial role in attracting vital pollinators like bees and butterflies to your garden.
To create your own seed bombs, start by gathering your supplies. You will need clay powder, compost, and a variety of wildflower seeds that are native to your region. Mixing these ingredients requires a ratio of approximately 1 part clay, 3 parts compost, and a handful of seeds. Begin by combining the clay powder and compost in a mixing bowl, ensuring that they are evenly distributed. Next, gradually add water to the mixture, stirring until it reaches a slightly wet consistency that can be formed into balls.
Once mixed, take small portions of the blend and roll them into balls about the size of a marble. Spread these seed bombs out on a tray to dry for 24-48 hours. After they fully dry, they are ready to be tossed into bare spots in your garden or open areas in your yard. The seeds within each bomb will germinate when conditions are favorable, contributing colorful blooms that not only beautify your space but also create a habitat for pollinators.
The environmental benefits of planting wildflowers through seed bombs cannot be overstated. Wildflowers support biodiversity, enhance soil health, and create a thriving ecosystem that benefits local wildlife. Moreover, making seed bombs can be an entertaining DIY project for the entire family, allowing for creativity while promoting environmental awareness. As you explore these 15 budget-friendly DIY garden organizing projects, consider including seed bombs as a standout feature of your garden’s springtime transformation.


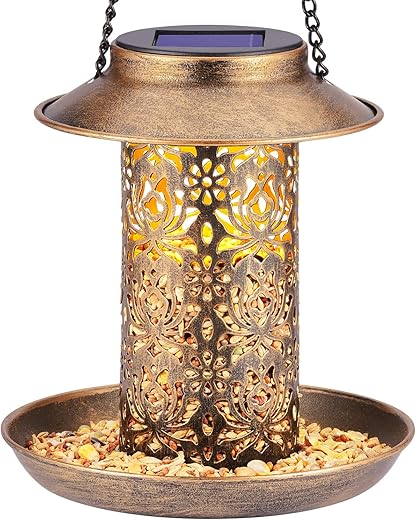
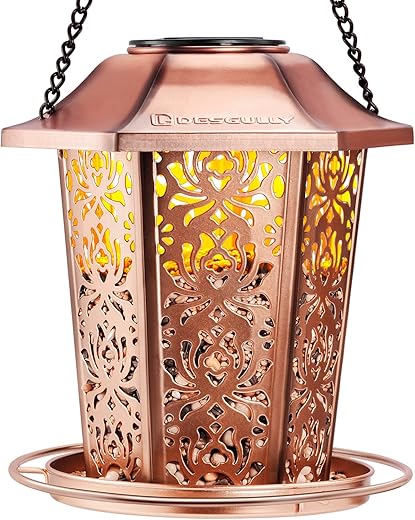
Tin Can Lanterns: Lighting Up Your Garden Evenings
Garden lanterns are an excellent way to enhance the aesthetic appeal of your outdoor space, creating a cozy atmosphere for evening gatherings. One particularly budget-friendly DIY project involves repurposing common household items like tin cans and jars into charming decorative lanterns. This project not only allows for creative expression but also contributes to sustainable practices by reusing materials. The possibilities for customizing these lanterns are limitless, as you can employ various patterns and colors to match your garden’s style and personal taste.
To begin crafting your tin can lanterns, gather materials such as empty tin cans, a hammer, a nail, and paint or washi tape. Start by filling the tin can with water and freezing it overnight. The ice will help maintain the can’s shape while you create holes for designs. Once frozen, remove the can from the freezer and gently tap holes into the sides using a hammer and nail to form your desired pattern. Rinse the can to remove any ice and paint it in vibrant colors to evoke the imagery of the spring season.
After your lanterns are prepared, consider incorporating lighting options such as fairy lights or solar lights. If using fairy lights, carefully position the lights inside the can, allowing some to trail out to create a whimsical effect. For solar lights, an easy method is to place a small solar light inside each newly created lantern, allowing it to charge during the day and illuminate your garden at night. Strategically place these lanterns along pathways, around seating areas, or even suspended from tree branches to elevate the magical ambiance of your garden during evening hours. With 15 budget-friendly DIY garden organizing projects like these, your outdoor space can become both functional and enchanting.


$9.49
$21.99

$16.99

$9.99
$8.99

$21.58

$27.99

Garden Tool Organizer: Declutter with Style
Maintaining an organized garden space is vital for both safety and efficiency. A clutter-free environment not only enhances your gardening experience but also reduces the likelihood of accidents. One practical solution for achieving this organization is by creating a budget-friendly DIY garden tool organizer. By upcycling an old crate, you can fashion a functional and stylish space for your gardening tools, ensuring that everything is readily accessible when needed.
To begin your project, first source a sturdy wooden crate, which can often be found at thrift stores, yard sales, or online marketplaces. Once you have your crate, consider how you want to arrange your tools. Installing hooks on the sides of the crate will allow you to hang tools such as trowels, pruners, and rakes, keeping them off the ground and easy to reach. Additionally, you can incorporate small shelves or compartments within the crate to store pots, soil, seeds, or fertilizers organized and tidy.
An innovative approach can include adding drawers to your organizer, which will provide hidden storage for smaller items like gloves, labels, and twine. For personalization, you may want to paint or stain the crate to match your garden aesthetics. Not only will this add character to your garden space, but it will also allow you to create a unique tool organizer that reflects your style.
By implementing these organizing techniques, you can effectively convert an ordinary crate into a remarkable garden tool organizer that meets your specific needs. With a focus on practicality, these 15 budget-friendly DIY garden organizing projects can transform your gardening area into a well-coordinated haven, promoting both enjoyment and efficiency in your spring gardening endeavors.
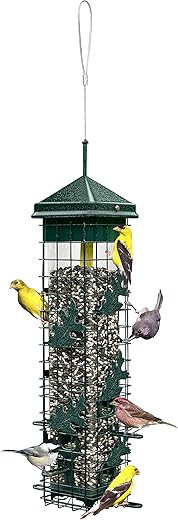
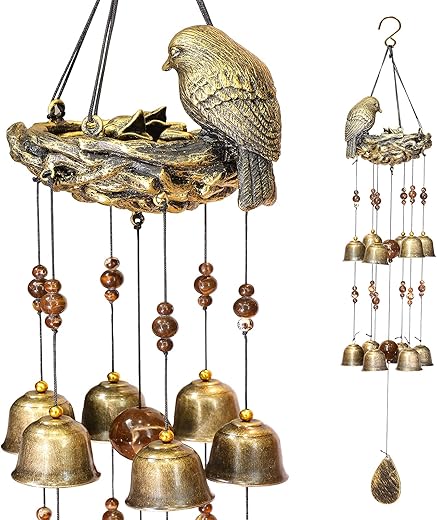
Bird Feeders: Inviting Wildlife into Your Garden
Creating a thriving garden ecosystem is immensely rewarding, and incorporating bird feeders can enhance this experience. Birdwatching not only offers relaxation but also contributes to a better understanding of local wildlife. By attracting various bird species, you bring nature closer to home, fostering biodiversity in your backyard. A DIY bird feeder is a practical, budget-friendly solution that allows you to engage in sustainable gardening while enjoying the beauty of birds in your space.
There are numerous easy-to-make bird feeder ideas that require minimal effort and budget. One popular option is to repurpose old plastic bottles. To create this, take a clean plastic bottle, make vertical slits near the bottom, and insert wooden dowels or sturdy branches to act as perches. Fill the bottle with birdseed and hang it using twine from a tree branch or another sturdy fixture. This project not only promotes recycling but also provides a continuous feeding source for your feathered friends.
Another innovative bird feeder can be fashioned from a wooden log. Select a log with a diameter of about 6 inches and drill deep holes into the top to hold birdseed. After drilling, fill the holes with mixed seeds suitable for various birds. Hang the log using chains or place it on sturdy supports in your garden. The natural design of this feeder will attract woodpeckers, chickadees, and finches, aligning with your goal of enhancing backyard biodiversity.
When considering seeds, use sunflower seeds, millet, or safflower to appeal to a range of birds. Different species have varying preferences, so offering a variety will likely yield more visitors. Implementing these 15 budget-friendly DIY garden organizing projects will not only beautify your outdoor environment but also create a habitat that supports and nurtures local wildlife.
Homemade Trellises: Creatively Using Space
In any garden, maximizing space while maintaining aesthetic appeal is crucial, especially in smaller areas. Homemade trellises serve as an excellent solution for achieving both functional and decorative objectives. They allow plants to grow vertically, which not only enhances their exposure to sunlight but also creates a visually appealing garden design. Various materials can be repurposed for crafting these structures, making trellising a budget-friendly DIY garden organizing project.


One common approach involves using branches or sticks from your yard or local park. This method encourages a rustic look while being eco-friendly. By interlacing branches into a crisscross pattern, you can create an organic trellis that supports climbing plants like tomatoes, cucumbers, or flowering vines. Bamboo is another versatile option; it’s lightweight and durable, making it perfect for creating a simple yet functional trellis. Using bamboo poles, you can easily construct A-frame or teepee designs, providing ample climbing space for various plants.
An even more unique alternative involves repurposing old bed frames. These metal or wooden structures can be transformed into sturdy trellises that add an interesting element to your garden. For instance, a twin-size bed frame can be propped upright against a wall or fence, offering a significant amount of vertical growing space. While crafting your homemade trellises, be sure to secure them adequately in the ground or to a stable backing for optimal plant support.
In smaller garden plots, trellising is especially advantageous. It not only conserves ground space but also allows for better air circulation around plants, which is essential for preventing mildew and other diseases. Utilizing homemade trellises in your garden design can enhance growth and presentation, making it an effective strategy for any gardener looking to organize their space effectively.
Stepping Stones: Create Paths with Personality
One of the most charming additions to any garden is a personalized path, and DIY stepping stones serve as an excellent means to achieve this goal while protecting the lawn from wear and tear. These unique pathways not only guide visitors through your outdoor space but also enhance its visual appeal. Making stepping stones can be a budget-friendly DIY project that allows for creativity and individuality.
To create your own stepping stones, you will need concrete pavers as a base material. These stones can be purchased from local hardware stores or made at home using molds. The process involves mixing concrete and pouring it into the molds, allowing it to set before decorating. Enhance your stepping stones by embedding small stones, glass beads, or even broken tiles into the wet concrete. This technique allows for a variety of design possibilities, enabling each stone to reflect personal aesthetics.


Beyond decorative touches, consider thematic designs for your stepping stones to add an intriguing narrative to your garden. For instance, you might opt for floral patterns using pressed flowers or paint stenciled shapes onto the cured stones. Another idea is to create a mosaic effect with colorful tiles, ensuring that no two stones are alike. Arrange your stepping stones in a way that effortlessly guides the eye and provides a defined pathway through flower beds or vegetable patches.
When designing your garden’s layout, think about the spacing between the stones. A distance of 18 to 24 inches is typically advisable to ensure comfortable foot placement. Incorporating these budget-friendly DIY garden organizing projects not only protects your lawn but also invites creativity and personality into your outdoor space. With the right tools and materials, you can transform ordinary concrete into stunning works of art that will be a testament to your creativity for years to come.
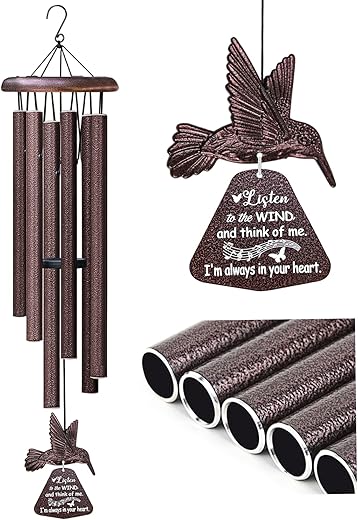
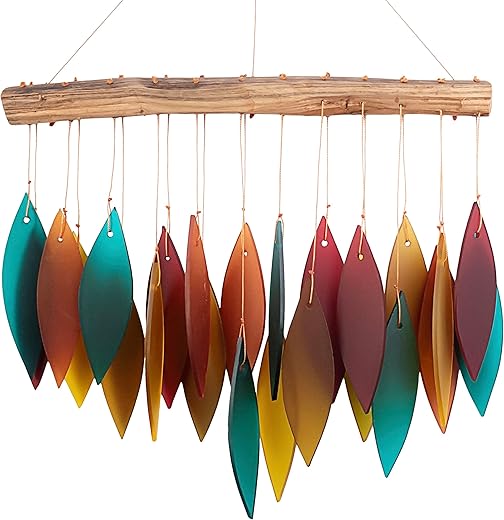
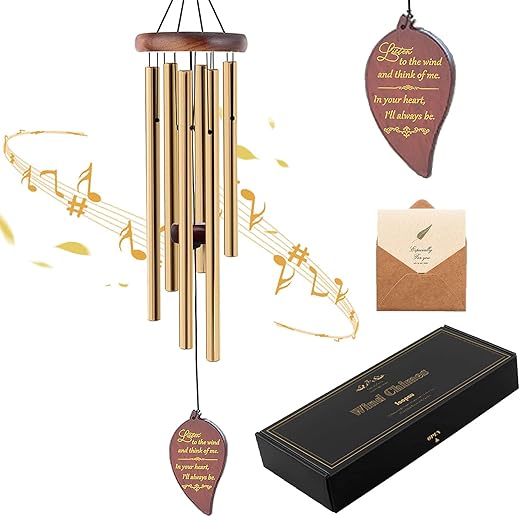
Wind Chimes: Adding a Melodic Touch to Your Garden
Creating DIY wind chimes can not only enhance the auditory experience of your garden but also serve as a delightful project for spring. Utilizing budget-friendly materials, you can craft unique wind chimes that reflect your personal style while celebrating the natural elements of your outdoor space. Items such as old keys, seashells, and glass beads are perfect for making these musical additions to your garden.
To start your DIY wind chime project, gather your materials. Old keys can provide a rustic aesthetic and create pleasing sounds when they clang together. If you have seashells from a recent beach trip, they can add a touch of coastal charm. Glass beads, available at most craft stores, can also contribute vibrant colors and interesting textures. You will need a sturdy base to which you can attach your items; this could be a wooden dowel, a tree branch, or even a circular frame made from wire.
To assemble your wind chimes, first, decide on the arrangement of your materials. You may choose to hang key sets in a descending order or mix in seashells and glass beads for a varied appearance. Use sturdy string or fishing line to securely attach each element to the base. Make sure the lengths of the strings allow for a clear sound and motion when the wind blows.
Finding the right place to hang your wind chimes is crucial for capturing the breeze. Look for spots in your garden where the wind frequently flows, such as near open pathways or under trees with gentle branches. As the wind interacts with your creation, the resulting melodies will enhance the tranquil atmosphere of your outdoor space, making your garden not just a visual delight but an auditory retreat as well.
With these simple ideas, you can create stunning wind chimes that reflect the spirit of spring while being an integral part of your budget-friendly DIY garden organizing projects.